
Setting up a private Minecraft server can provide a more personalized and controlled gaming experience. Whether you want to play with friends, build together, or explore the game without interruptions from strangers, having your server is the way to go. This guide will take you through the steps to set up your private Minecraft server.
Step 1: Choose Your Minecraft Version
Before you start setting up your server, decide which version of Minecraft you want to use. The most common versions are:
- Java Edition: Best for modding and custom server setups.
- Bedrock Edition: Compatible with multiple platforms, including consoles and mobile devices.
For this guide, we will focus on setting up a server for Minecraft Java Edition.
Step 2: Prepare Your System
a. System Requirements
Ensure your system meets the necessary requirements to run a Minecraft server:
- CPU: A multi-core processor (Intel Core i5 or equivalent).
- RAM: At least 2 GB dedicated to the server (more for larger servers).
- Storage: At least 2 GB of free disk space.
- Internet Connection: A stable connection with good upload speed.
b. Install Java
Minecraft Java Edition requires Java to run. Make sure you have the latest version of Java installed:
- Go to the Java download page.
- Download and install the latest version of Java.
- Verify the installation by opening the Command Prompt (Windows) or Terminal (Mac) and typing
java -version. You should see the installed version of Java.
Step 3: Download the Minecraft Server Software
- Visit the Minecraft server download page.
- Download the server.jar file (the latest version).
- Create a new folder on your computer (e.g.,
MinecraftServer) and place theserver.jarfile in that folder.
Step 4: Run the Server
- Open the Command Prompt (Windows) or Terminal (Mac).
- Navigate to the folder where you saved
server.jar. You can do this by using thecdcommand. For example:- Windows:
cd C:\path\to\MinecraftServer - Mac:
cd /path/to/MinecraftServer
- Windows:
- Run the server with the following command:bash
java -Xmx1024M -Xms1024M -jar server.jar nogui-Xmxsets the maximum amount of RAM the server can use (increase this for larger servers).-Xmssets the initial amount of RAM allocated to the server.
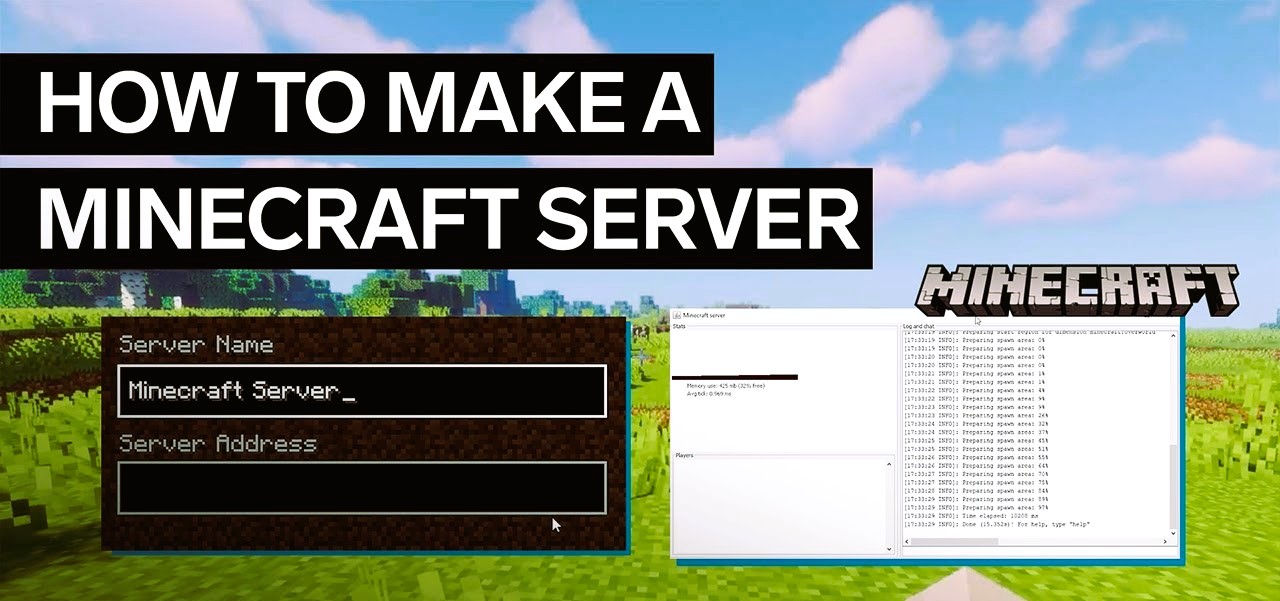
- On the first run, the server will generate some files and folders, including
eula.txt. Open this file and changeeula=falsetoeula=trueto accept the End User License Agreement. - Run the server command again to start the server. Like this article? Read also about the future of cloud gaming.
Step 5: Configure Your Server
a. Server Properties
- Locate the
server.propertiesfile generated in your server folder. Open it with a text editor (like Notepad). - Adjust the settings according to your preferences. Key settings include:
level-name: Change the name of your world.max-players: Set the maximum number of players allowed.gamemode: Set the default game mode (survival, creative, etc.).pvp: Enable or disable player versus player combat.
b. Whitelisting Players
To ensure that only invited players can join your server, you can enable whitelisting:
- In the
server.propertiesfile, setwhite-list=true. - Create a new file named
whitelist.jsonin the server folder. - Add player usernames to this file in the following format:json
[ { "uuid": "player-uuid", "name": "player-name" } ]
You can find player UUIDs using various online tools.
Step 6: Port Forwarding
To allow your friends to connect to your server over the internet, you’ll need to set up port forwarding:
- Log in to your router’s web interface. (Check your router’s manual for the IP address and login credentials.)
- Find the port forwarding section. This is often located under “Advanced” or “NAT” settings.
- Forward port 25565 (the default Minecraft port) to the local IP address of your server (the device running the server).
- Save the settings and restart your router.
To find your local IP address, open the Command Prompt (Windows) or Terminal (Mac) and type ipconfig (Windows) or ifconfig (Mac).
Step 7: Share Your Server IP

- To find your public IP address, visit a site like WhatIsMyIP.com.
- Share your public IP address and the port (25565) with your friends so they can connect to your server.
Step 8: Connecting to the Server
Players can join the server by following these steps:
- Open Minecraft Java Edition.
- Click on “Multiplayer.”
- Click on “Add Server.”
- Enter a server name and the server IP address (e.g.,
your-ip-address:25565). - Click “Done,” and the server will appear in the server list. Select it and click “Join Server.”
Congratulations! You have successfully set up a private Minecraft server for you and your friends. By following these steps, you can create a customized gaming experience, complete with control over gameplay settings and community engagement. Remember to regularly back up your server data and keep it updated to ensure the best performance. Happy crafting!
For additional resources and information about Minecraft servers, check out the Minecraft Wiki.